How to Add a Border in Google Docs
Borders add an extra professional touch while drawing attention to your document. At the moment, the free to use Google Docs currently doesn’t have a built-in feature to add document borders.
Luckily, there are several other ways to add a border in Google Docs.
The free to use Google Docs word processor competes against huge industry names like Microsoft Word. It’s a great solution for people who need quick and easy edits from anywhere in the world at no cost.
However, it's free formula requires sacrifices on the developer’s end, which becomes evident when trying to perform more advanced functions.
At the time of writing, there’s no feature in Google Docs to add borders to your document. However, users have figured out many workarounds to simulate borders.
Related: How to Change Margins In Google Docs
We’ve recently explored how to add a text box in Google Docs, and how to delete empty pages. In this article, we’ll be looking into how to use features such as tables and drawing to create document borders in Google Docs.
How to add a border in Google Docs using a table
Tables offer you the ability to add simple borders to your Google Docs documents. They’re displayed and accessible on all versions of Docs, including mobile. When done correctly, a table allows you to create a border that goes across your entire page.
- Open Google Docs and begin editing the document you want to add a border to. We recommend starting with an empty document and inserting content after the border has been created.
- Click on the Insert tab, then hover over Table with your mouse. A grid will appear where you would normally select the number of cells in your table.
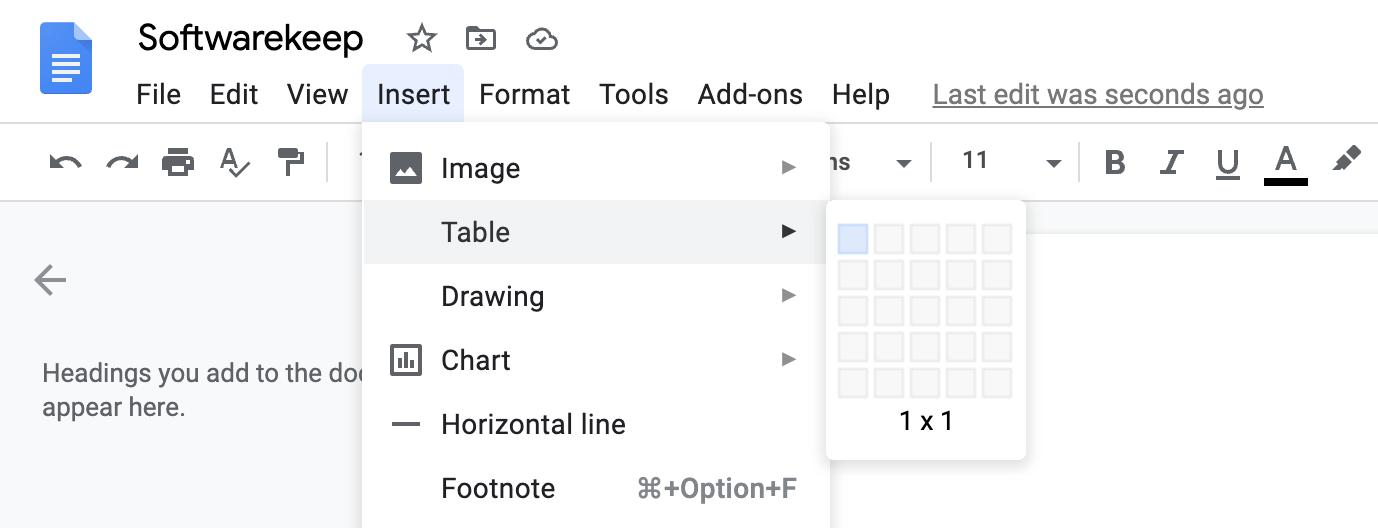
- Reduce the number of rows and columns until you have the first box in the upper-left corner selected. When clicking on this box, Google Docs will create a 1 x 1 table.
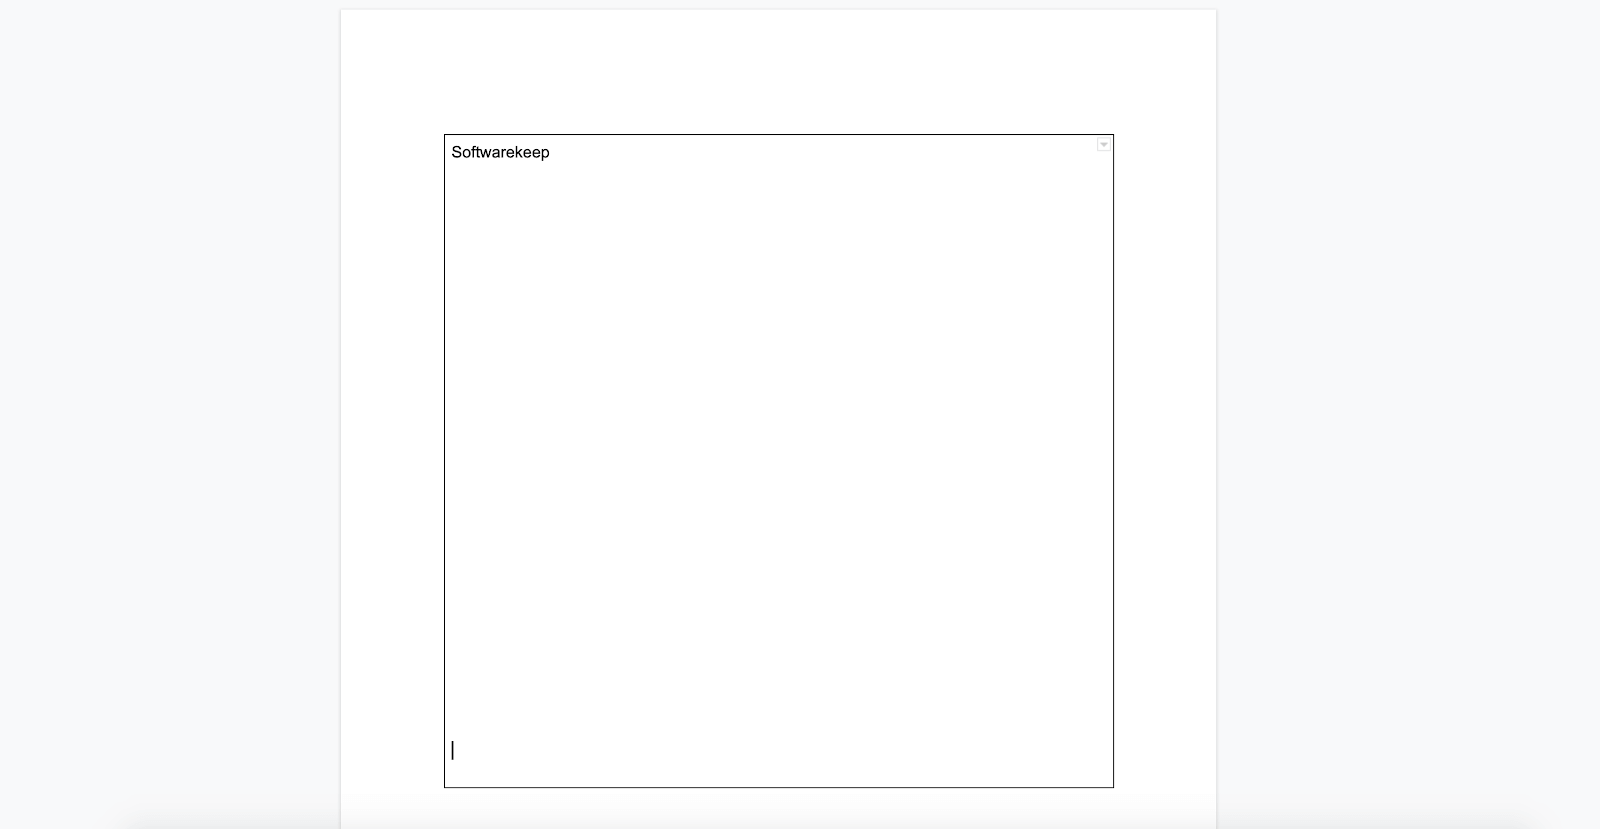
*In some versions of Google Docs, you may have to tap the Insert Table button to finalize the table. - Click inside the table. Press the Enter key on your keyboard repeatedly to expand the table all the way down the page. This will simulate a page-long border.
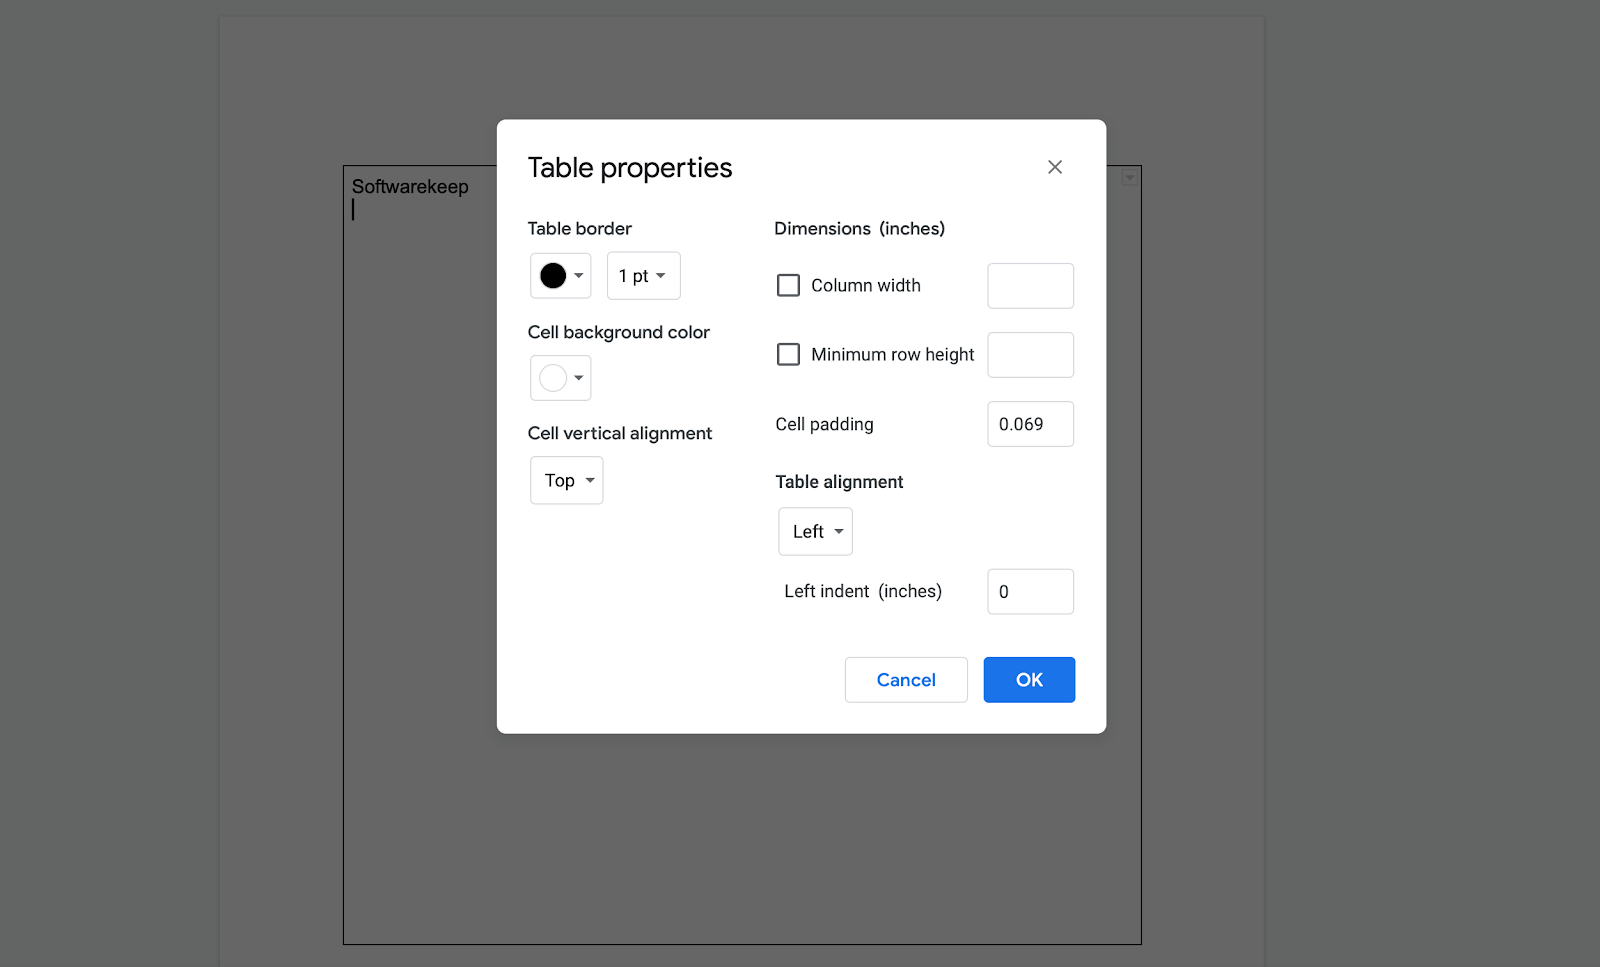
- Want to customize your border? Click on Format from the Google Docs menu bar, then hover over Table with your cursor and select Table Properties.
- The Table properties box should appear on your screen. Change the cell's color and thickness to alter how your document border looks like. You can also want to increase the cell padding to add more space between the border and the content on the page. When you're done, just click the OK button.
- You can bring the borders closer to the edge of the page by heading to File in the Google Docs menu and clicking on Page Setup. Here, you can adjust the space between the margins on the top, bottom, left, and right.
How to add a border in Google Docs using draw
Another popular way of inserting page borders is by creating a rectangle drawing with the integrated drawing feature in Google Docs. Please note that this feature will display on all versions of Google Docs, however, it cannot be fully edited on mobile.
- Open Google Docs and begin editing the document you want to add a border to. We recommend starting with an empty document and inserting content after the border has been created.
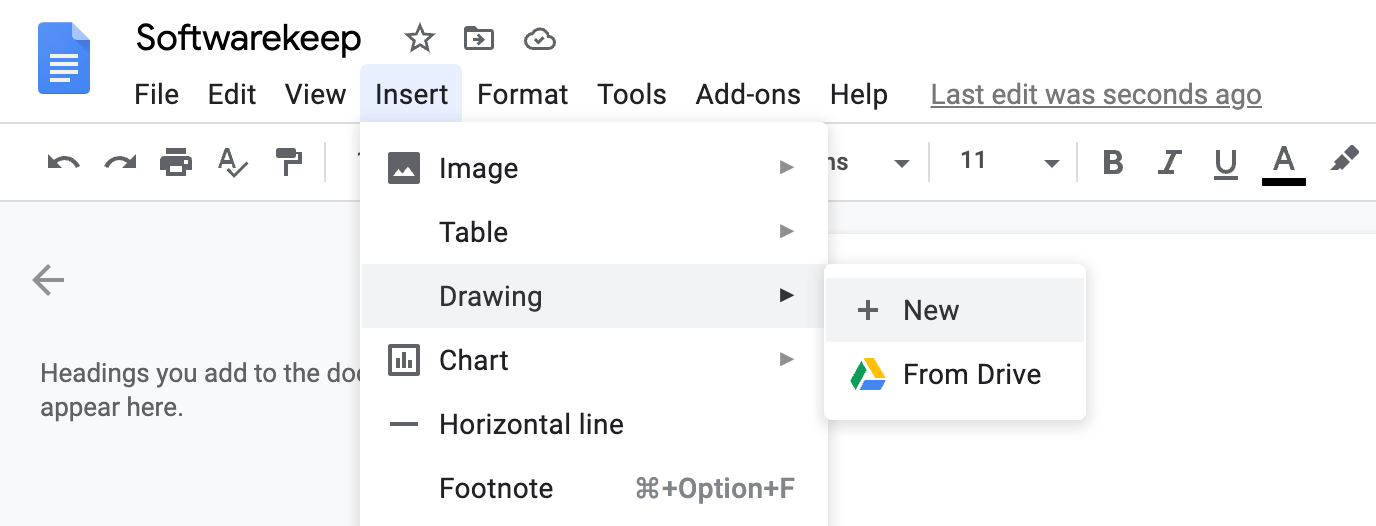
- Click on the Insert tab from the toolbar, then hover over Drawing with your mouse. Click on the + New option to create a new drawing.
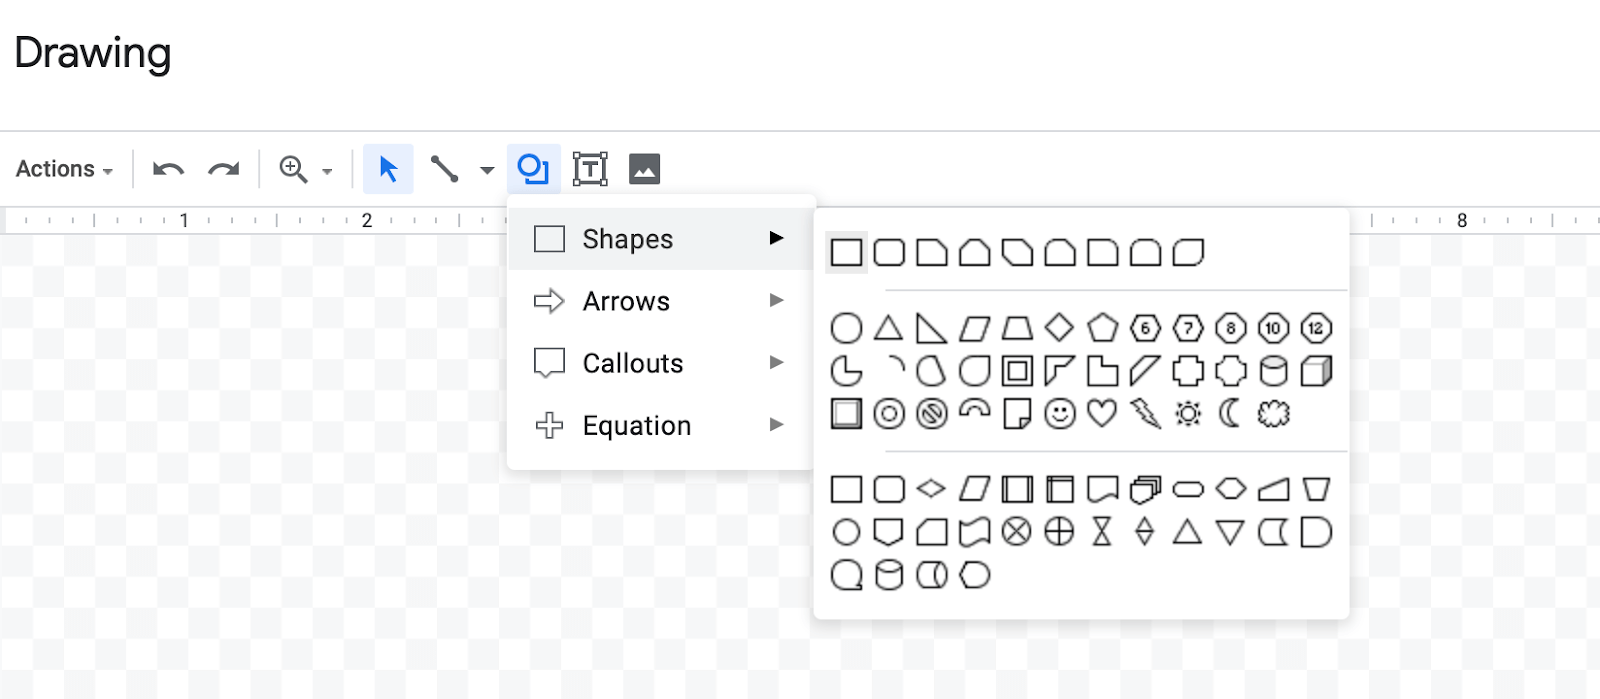
- The Drawing box should appear on the screen. Here, click on the Shapes button (pictured below) and choose whichever shape you want to use for your page border.
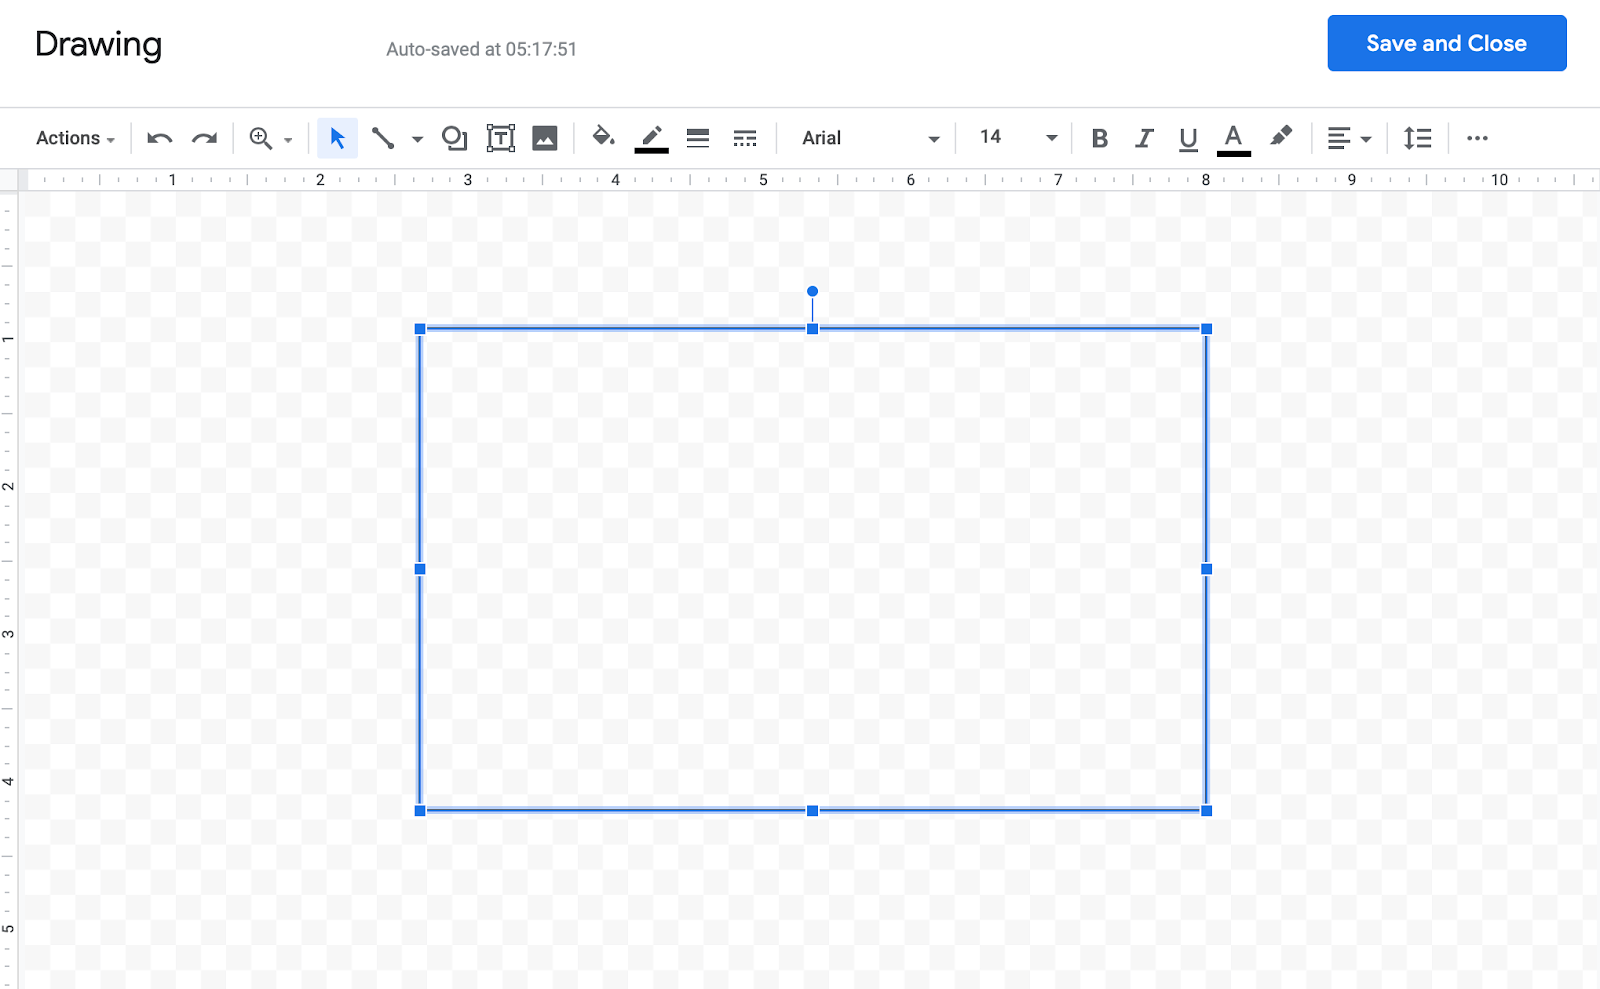
- Draw the shape by clicking inside the checkered area and dragging your mouse cursor. As we’re creating a border, it’s best to keep the shape as a long rectangle.
- For borders, it’s ideal to make the shape transparent by clicking on the Fill icon (shown as a paint bucket in the toolbar) and selecting Transparent. To further customize the shape, use the drawing toolbar.

- Once you’re done customizing your border, click on the Save and Close button. You’ll return to your document with the border present in it. If needed, make adjustments to the size of the border by dragging any of the 8 anchor points for the shape.
- To modify the border in the future, click on it, and select the Edit button. You’ll be taken back into the drawing view you used to create the border. You can make any adjustments to the contents and customization, then press the Save and Close button to finalize the modifications.
- You can only edit your borders made with the draw feature on desktop versions of Google Docs. However, you can still copy, remove, or move the border elsewhere on non-supported platforms.
How to add a border in Google Docs using an image
Google Docs allows you to insert an image you already have on your computer to use for the borders of your document. Many online sources create free to use border images, making it easy to highly personalize a Google Docs document. We recommend using this method for creating invitations, cards, and other graphics.
- Open Google Docs and begin editing the document you want to add a border to. We recommend starting with an empty document and inserting content after the border has been created.
- Click on the Insert tab from the toolbar, then hover over Drawing with your mouse. Click on the + New option to create a new drawing.

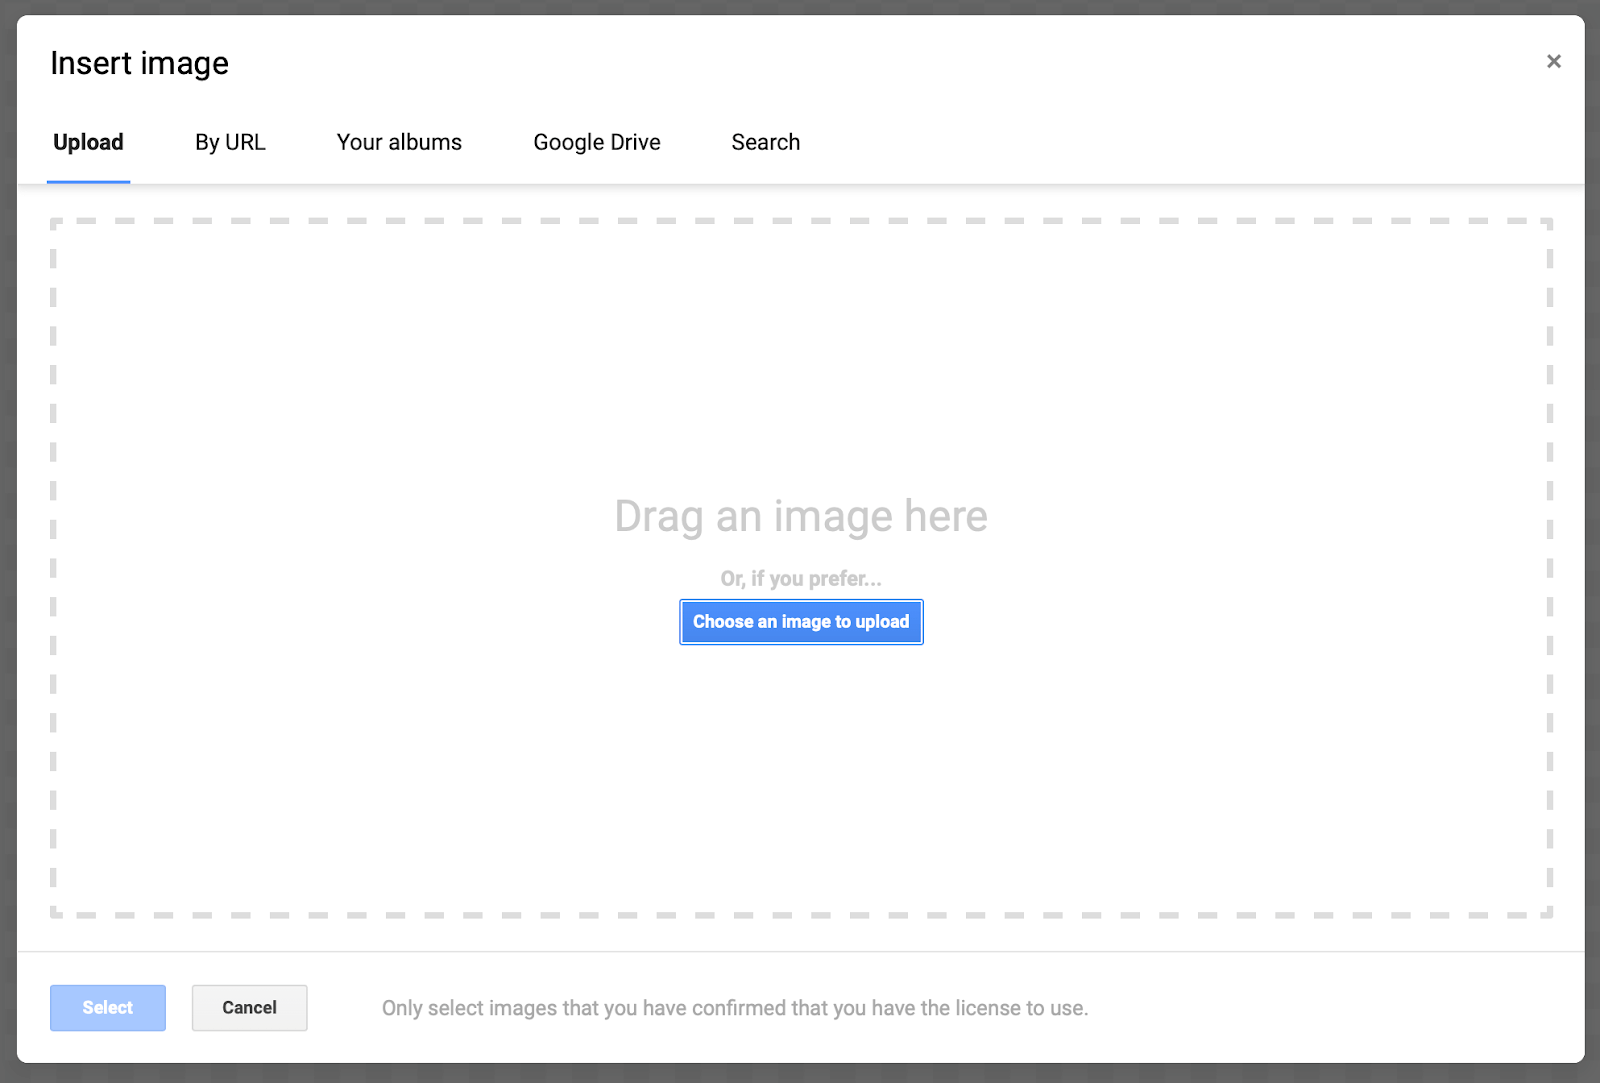
- The Drawing box should appear on the screen. To insert your own border, click on the Image icon in the toolbar, pictured below.

- Choose how you want to insert your border-image. You may upload your image from your computer, insert its online URL, or copy-paste it from your clipboard. If you don’t have a border image ready, click on the Search option to look for one online.
- After inserting the border, click on the Text Box icon. Drag your mouse cursor inside the borders to create a space for your content. You can customize the text inside the borders the same way you would format text normally using the toolbar.
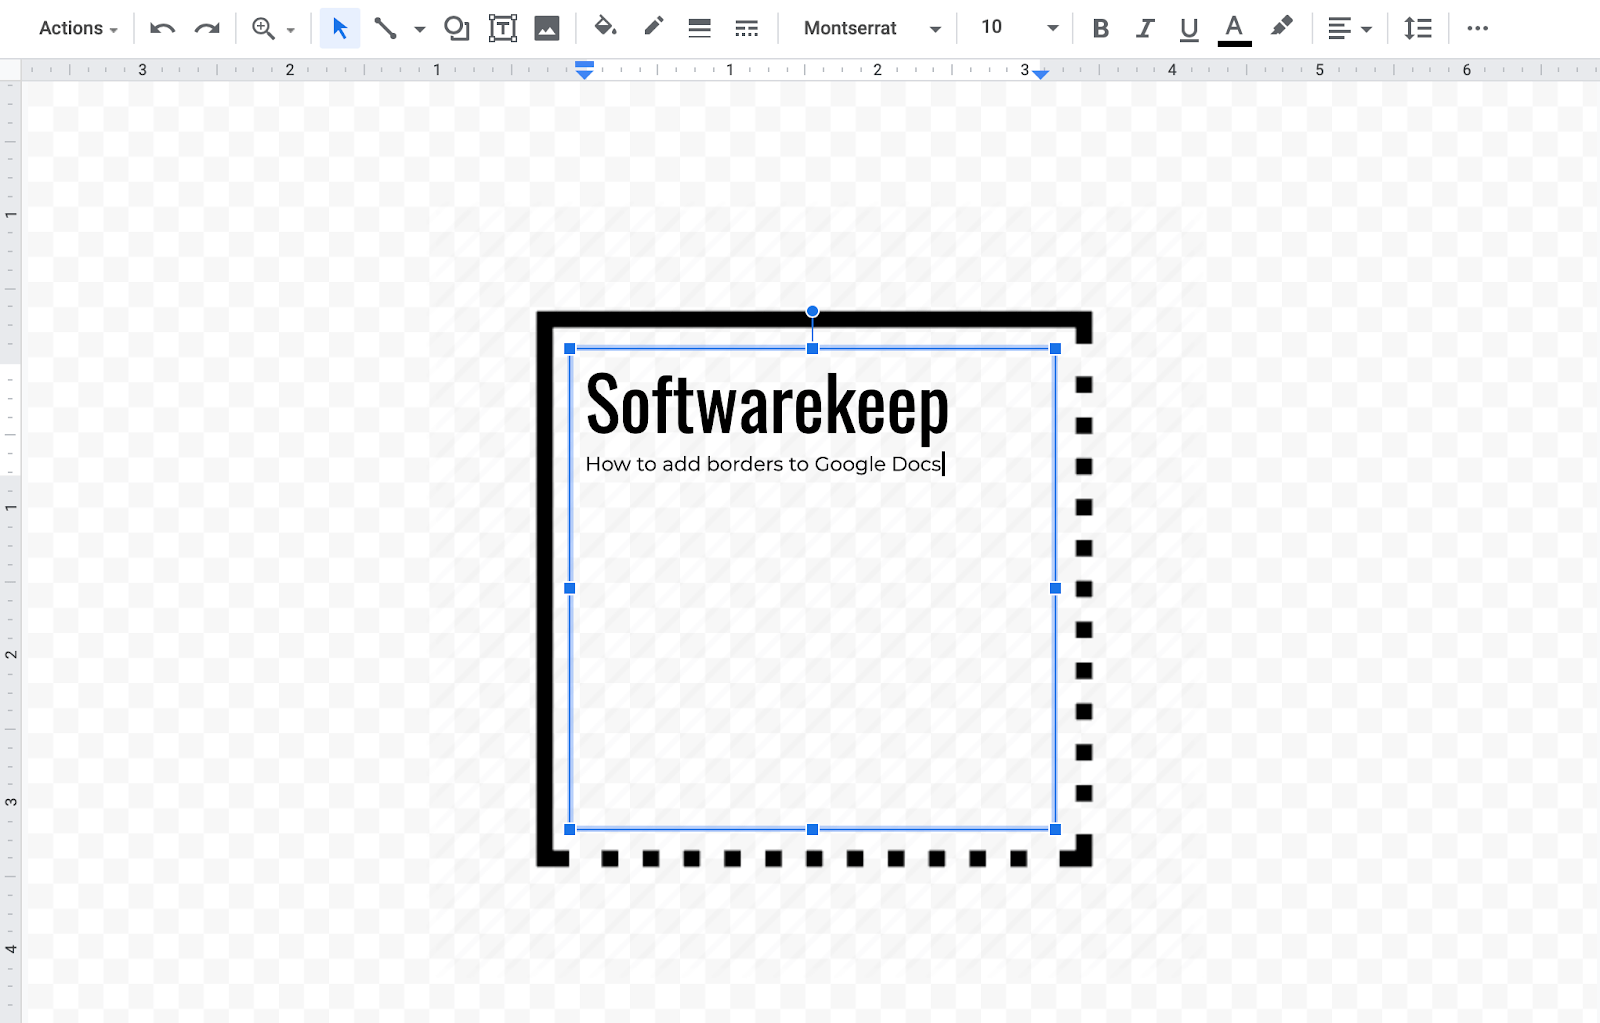
- After you’re done adding the contents within the borders, click on the Save and Close button.
- To modify the border in the future, click on it, and select the Edit button. You’ll be taken back into the drawing view you used to create the border. You can make any adjustments to the contents and customization, then press the Save and Close button to finalize the modifications.
- You can only edit your borders made with the draw feature on desktop versions of Google Docs. However, you can still copy, remove, or move the border elsewhere on non-supported platforms.
Final thoughts
We hope that our article helped you successfully add a border to your Google Docs document.
If you’re looking for more guides or want to read more tech-related articles, consider subscribing to our newsletter. We regularly publish tutorials, news articles, and guides to help you in your day-to-day tech life.
About the Author