How to Curve Text in Word

This article is a step-by-step guide on how to curve text in word. Whether you're using a Word for Mac user or PC, Word in Office 365, click here to learn more.
Want to curve text in your Word document? It's easy:
Choose the Word Art option, then click the text icon that looks the way you want your curved text to look. Click the Drawing Tools Format tab at the top of the window. Choose the Text Effects option, click Transform, then click a curve type from the options on the menu. Adjust the layout options for your curved text.
Essays and long research documents aren’t the only things you can create in Microsoft Word. Many people use the application to work on more lighthearted projects, such as party invitations, flyers, and posters. However, simple headers just don’t make the cut when you’re trying to get the attention of future viewers.
Adding extra touches to your Word documents can increase the visual impact of your projects, which leads to more attention to what you’re trying to convey with your page. One popular technique is using curves when working with text, which is especially useful for large headers or wrapping text around shapes and images.
Our article focuses on how you can warp and curve text in Microsoft Word to create unique, interesting designs to feature in your projects.
Curve words or text in Word
There are tons of different ways you can warp text to form a curve in Word, which can all be accessed by following the directions below. We recommend you play around with the various options to find the perfect setting that suits your vision.
Please note that the functionality described below is not available in Word Online, or desktop versions older than Word 2013.
- Open the Word document which you want to use for this project, or create a new blank document.
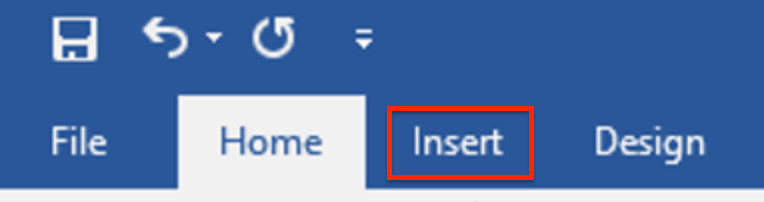
- Switch over to the Insert tab in your ribbon, which is the header-Esque interface located on the top section of the Word window.
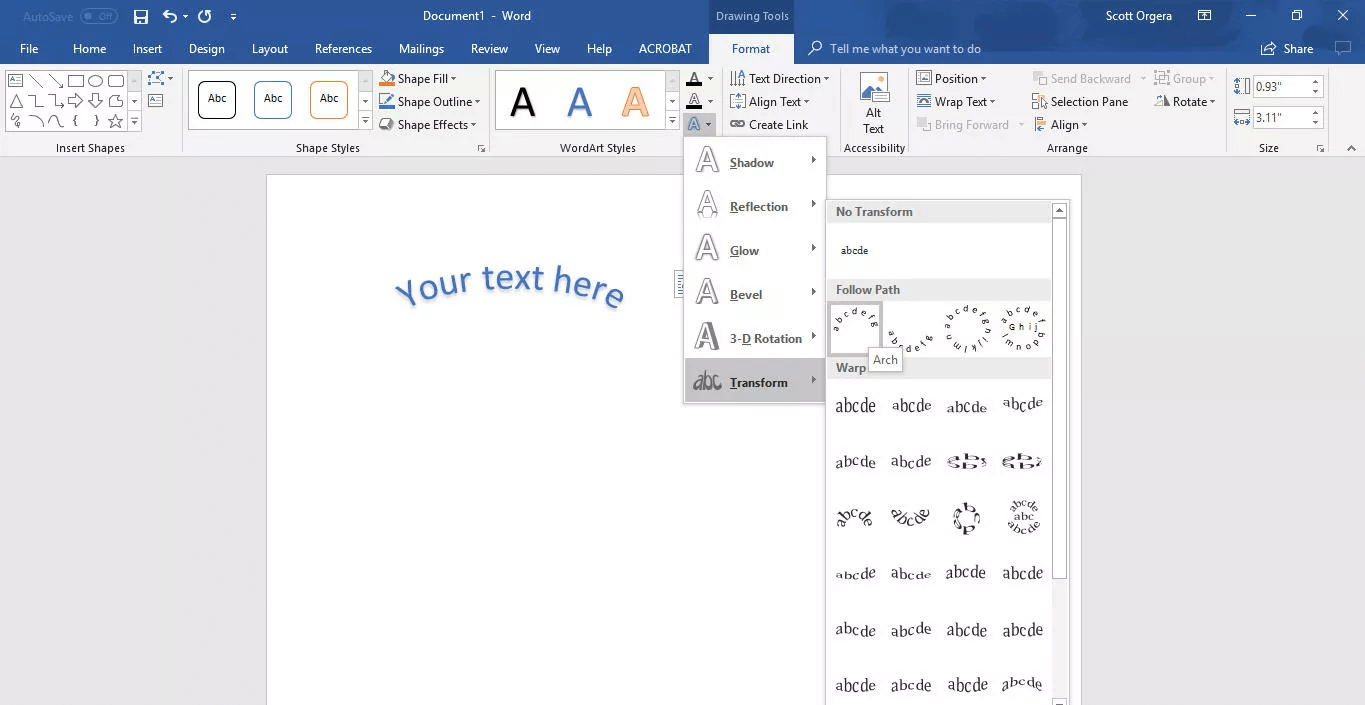
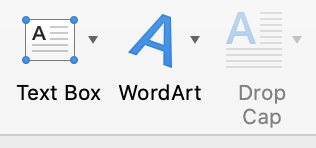
- Click on the Insert WordArt icon, found in the Text section of Word 2016 and above. The icon is a slanted, blue colored letter A.
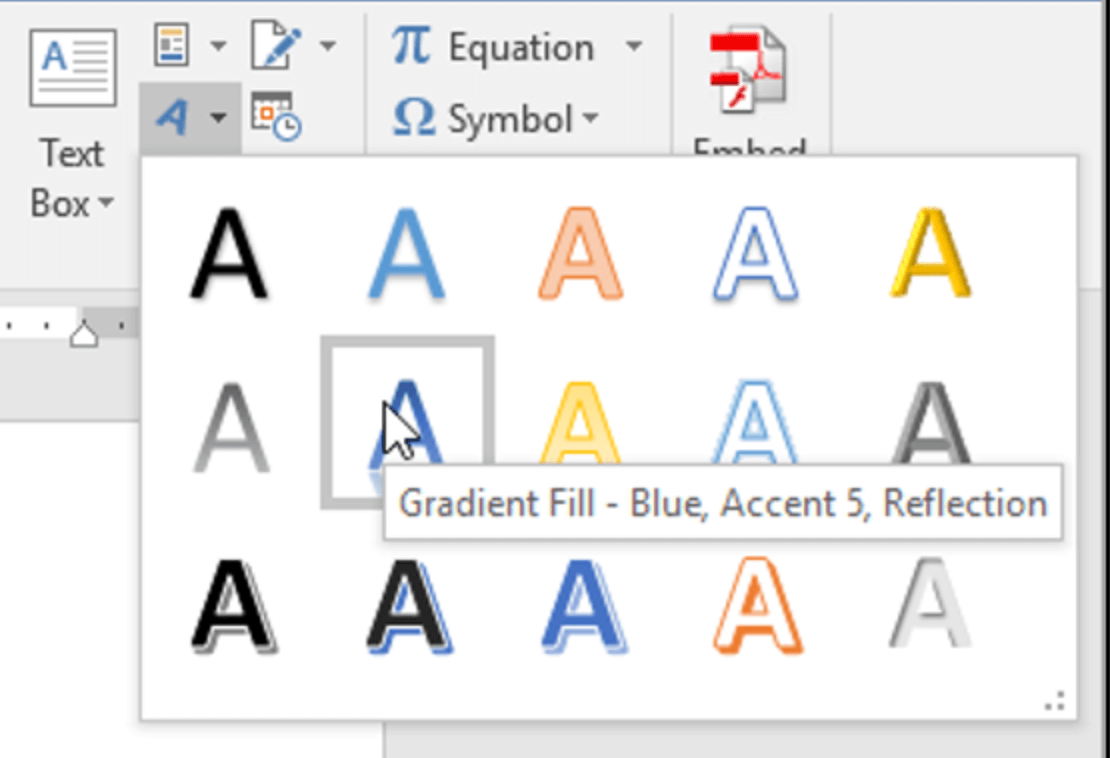
- A pop-up menu will open up with various different styles of text. Select any of these styles and colors to insert a placeholder into your document with words such as “Your text here.”
- Edit the text to say whatever you’d like, then select it by clicking on it once.
- The Drawing Tools: Format tab will open up. Click on the Text Effect icon, depicted by a white letter A with a light-blue glow around it.
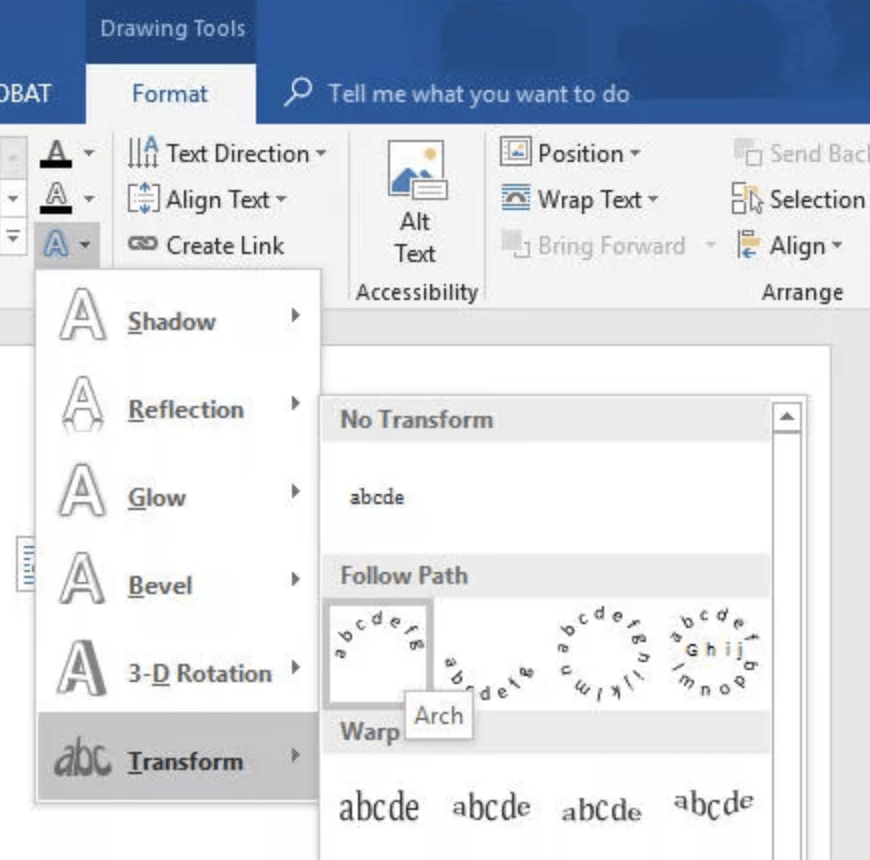
- Hover over the Transform option from the drop-down menu to expand it and see all of the available warp styles for your text.
- Click on a curve or bend that you like. You can preview any options by simply hovering your mouse over them. If you choose from the “Follow path” section, you have the option to edit the curve your text follows by dragging the yellow rectangle until you’re satisfied with the result.
Curve words or text in Word for Mac
Mac users are able to use the same warping techniques as Windows users by following the directions below.
- Open the Word document which you want to use for this project, or create a new blank document.
- Switch over to the Insert tab in your ribbon, which is the header-esque interface located on the top section of the Word window.
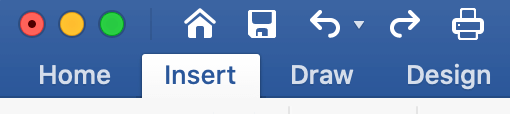
- Click on the Insert WordArt icon, shown as a slanted, blue colored letter A with the WordArt text underneath it. (See picture below.)
- A pop-up menu will open up with various different styles of text. Select any of these styles and colors to insert a placeholder into your document with words such as “Your text here.”

- Edit the text to say whatever you’d like, then select it by clicking on it once.
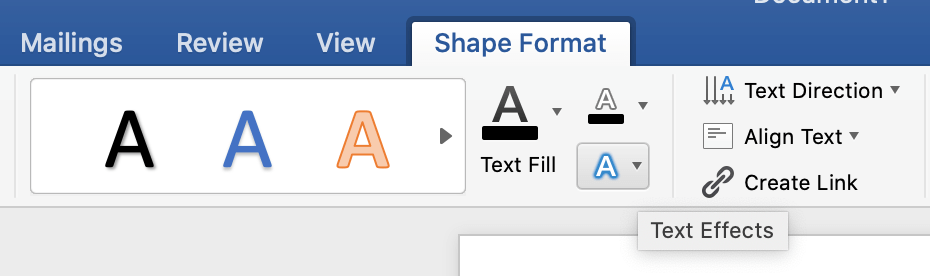
- The Shape Format tab will open up. Click on the Text Effect icon, depicted by a white letter A with a light-blue glow around it. (See picture below.)
- Hover over the Transform option from the drop-down menu to expand it and see all of the available warp styles for your text.
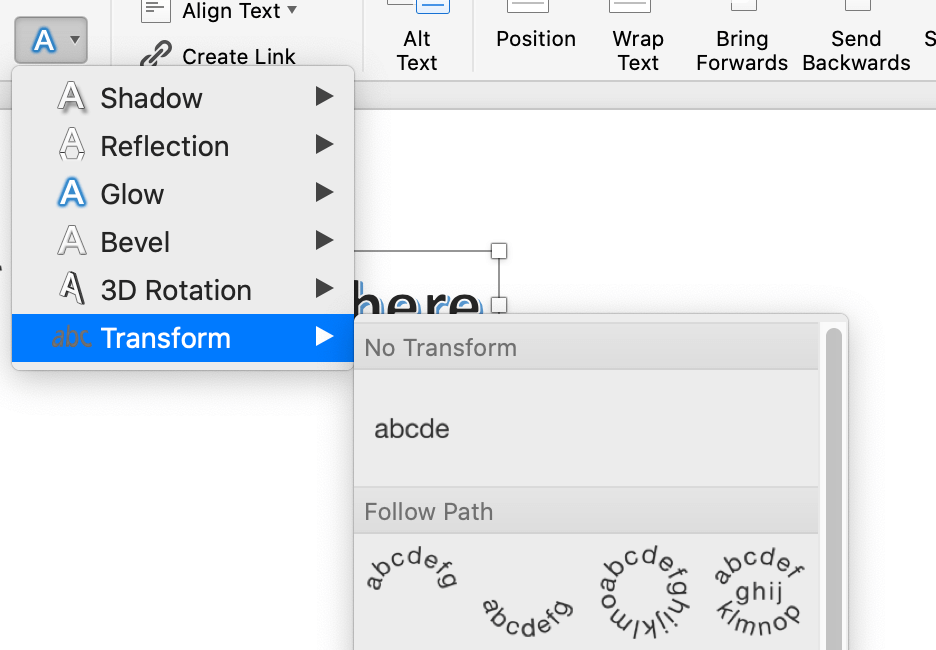
- Click on a curve or bend that you like. You can preview any options by simply hovering your mouse over them. If you choose from the “Follow path” section, you have the option to edit the curve your text follows by dragging the yellow rectangle until you’re satisfied with the result.
You don’t have to delete your entire text and retype it to remove the curves you (or someone else) previously applied. If you want to remove the curves from a Word text, follow the instructions below.
- Perform the steps 2. to 7. to reach the Transform section while having your curved text selected.
- Select the No Transform option to remove any curves previously applied to the text.
Final thoughts
Now that you know how to curve text in Word, what Next? Download these Microsoft Word Templates to make your next Report Quicker.
Further Reading
> How to Insert a Signature in Microsoft Word
> How to Sort by Date in Excel
> How to Wrap Text in PowerPoint
> How to Insert a Horizontal Line in Word
> Insights into the Windows 10 Start Menu
About the Author